基于ffmpeg的m3u8下载[调整key替换逻辑,更新解析逻辑]

闲来没事,找了个av网站,看了几个视频,然后想下载一下。结果发现多年不上这些av网站,现在的av网站播放的源文件已经不是avi或者mp4了,而是m3u8的播放列表。在firefox中可以使用Video DownloadHelper 来获取相应的下载地址,但是有的时候如果m3u8中包含的是播放列表,会无法获取下载链接。

于是就想着怎么直接下载文件,其实通过ffmpeg可以很方便的获取下载链接:

只需要下面的一样命令:

 ffmpeg -protocol_whitelist "file,http,crypto,tcp,https,tls" -i https://videox11.ynkcq.com:8081/20200109/8Pr79HKk/600kb/hls/index.m3u8 -c copy out.mp4
Continue Reading

Django 限制访问频率

最近做了一个系统由于部分接口需要进行耗时操作,因而不希望用户进行频繁访问,需要进行访问频率限制。如果要自己实现一个访问限制功能相对来说也不会太复杂,并且网上有各种代码可以参考。如果自己不想实现这个代码可以使用 Django Ratelimit

Django Ratelimit is a ratelimiting decorator for Django views.

https://travis-ci.org/jsocol/django-ratelimit.png?branch=master
Code: https://github.com/jsocol/django-ratelimit
License: Apache Software License
Issues: https://github.com/jsocol/django-ratelimit/issues
Documentation: http://django-ratelimit.readthedocs.org/

使用方法也相对来说比较简单:

@ratelimit(key='ip', rate='5/m')
def myview(request):
    # Will be true if the same IP makes more than 5 POST
    # requests/minute.
    was_limited = getattr(request, 'limited', False)
    return HttpResponse()

@ratelimit(key='ip', rate='5/m', block=True)
def myview(request):
    # If the same IP makes >5 reqs/min, will raise Ratelimited
    return HttpResponse()

@ratelimit(key='post:username', rate='5/m', method=['GET', 'POST'])
def login(request):
    # If the same username is used >5 times/min, this will be True.
    # The `username` value will come from GET or POST, determined by the
    # request method.
    was_limited = getattr(request, 'limited', False)
    return HttpResponse()

@ratelimit(key='post:username', rate='5/m')
@ratelimit(key='post:tenant', rate='5/m')
def login(request):
    # Use multiple keys by stacking decorators.
    return HttpResponse()

@ratelimit(key='get:q', rate='5/m')
@ratelimit(key='post:q', rate='5/m')
def search(request):
    # These two decorators combine to form one rate limit: the same search
    # query can only be tried 5 times a minute, regardless of the request
    # method (GET or POST)
    return HttpResponse()

Continue Reading

Django admin Foreignkey ManyToMany list_display展示

class Ghost(models.Model):
    create = models.DateTimeField(default=timezone.now, help_text='创建时间')
    update = models.DateTimeField(auto_now=True, help_text='修改时间')
    speed = models.IntegerField(default=0, help_text='速度')
    name = models.CharField(max_length=64, help_text='名称')


class InstanceTask(models.Model):
    create = models.DateTimeField(default=timezone.now, help_text='创建时间')
    update = models.DateTimeField(auto_now=True, help_text='修改时间')
    name = models.CharField(max_length=64, help_text='副本名称')

class InstanceTaskMap(models.Model):
    create = models.DateTimeField(default=timezone.now, help_text='创建时间')
    update = models.DateTimeField(auto_now=True, help_text='修改时间')
    name = models.CharField(max_length=64, help_text='地图名称')
    ghosts = models.ManyToManyField(Ghost, help_text='Ghost')
    instance_task = models.ForeignKey(InstanceTask, related_name='instancetask_instancetaskmap', blank=True, null=True,
                                      help_text='副本任务', on_delete=models.SET_NULL)

对于上面的model,如果要在django admin中展示ghosts信息,那么在list_display中直接加入’ghosts’ 会报下面的错误:The value of ‘list_display[1]’ must not be a ManyToManyField.

如果要解决这个问题可以使用下面的代码来展示:

class InstanceTaskMapAdmin(admin.ModelAdmin):
    list_display = ('name', 'instance_task', 'id', 'index', 'get_ghost_name', 'introduction')

    # https://blog.csdn.net/weixin_42134789/article/details/83686664
    def get_ghost_name(self, obj):
        ghost_list = []
        for g in obj.ghosts.all():
            ghost_list.append(g.ghost.name)
        return ','.join(ghost_list)

    get_ghost_name.short_description = "Ghosts" 

如果需要更丰富的信息可以参考上面代码注释中的链接。

Continue Reading

Django REST framework foreignkey 序列化

Django REST framework is a powerful and flexible toolkit for building Web APIs.

Some reasons you might want to use REST framework:

之前虽然也用了Django REST framework 但是序列化函数基本都是自己写的,并没有用框架带的序列化函数。这次不想在搞的那么麻烦,于是使用Django REST framework带的序列化函数。

但是在序列化foreignkey的时候却发现只有id,其余的数据没有。

model定义:

class PlayerGoodsItem(models.Model):
    create = models.DateTimeField(default=timezone.now, help_text='创建时间')
    update = models.DateTimeField(auto_now=True, help_text='修改时间')
    goods_item = models.ForeignKey(GoodsItem, related_name='goodsitem_playergoodsitem', help_text='商品信息',
                                   on_delete=models.CASCADE)

序列化代码:

class PlayerGoodsItemSerializer(serializers.ModelSerializer):
    class Meta:
        model = PlayerGoodsItem
        fields = "__all__"

Continue Reading

jupyter notebook 调整字体 以及matplotlib显示中文

原生的jupyter theme看起来比较蛋疼,尤其是字体和字号。为了修改这个配置可以安装 jupyter theme。

项目链接: https://github.com/dunovank/jupyter-themes 如果不喜欢英文可以参考这个链接:https://www.jianshu.com/p/6de5f6cce06d

上面的样式对应的配置命令:
jt  -f fira -fs 11 -cellw 90% -ofs 11 -dfs 11 -T -t solarizedl

除此之外matplotlib 默认不支持中文显示,主要是字体问题,可以通过下面的代码配置来让matplotlib 支持中文

from matplotlib import pyplot as plt
%matplotlib inline
font = {'family' : 'MicroSoft YaHei',
'weight' : 'bold',
'size' : 10}
plt.rc("font", **font)

实际效果,另外还可以使用altair ,altair 默认支持中文显示 https://altair-viz.github.io

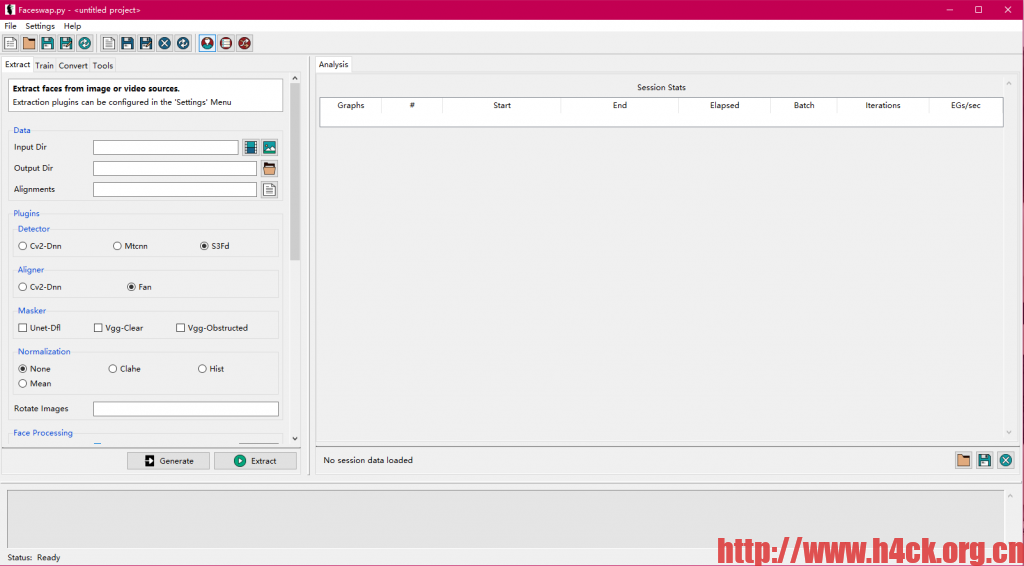
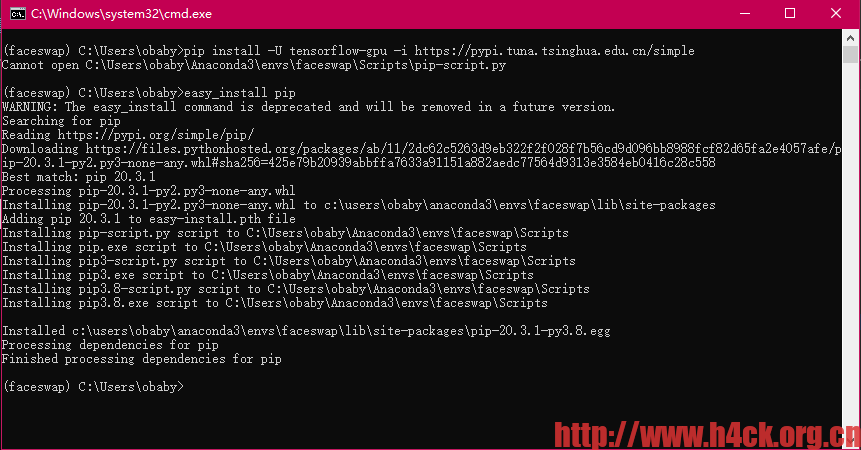
Win10 Tensorflow-gpu 不完全安装手册

网上随便搜一下就会发现关于Tensorflow-gpu的安装文章非常的多,但是写的都比较简略。并且官网的文档写的也比较的简略,并且google 官网上文档对于windows版本的也非常简略。

官网列出的硬件软件需求如下:

硬件要求

系统支持以下支持 GPU 的设备:

软件要求

必须在系统中安装以下 NVIDIA® 软件:

除此之外就没有更多的信息了,在官方的pip安装说明页面中可以看到windows版本的其实对于python是有要求的,官方支持的版本如下:

Continue Reading

阿里云oss 批量检测文件是否存在

虽然阿里云oss的sdk提供了检测文件是否存在,但是在批量处理的时候你就会发现检测一次需要联网一次,如果文件过多最后会提示你链接数超过限制,最终无法进行检测了。

下面是阿里云提供的示例代码:

# -*- coding: utf-8 -*-
import oss2

# 阿里云主账号AccessKey拥有所有API的访问权限,风险很高。强烈建议您创建并使用RAM账号进行API访问或日常运维,请登录 https://ram.console.aliyun.com 创建RAM账号。
auth = oss2.Auth('', '')
# Endpoint以杭州为例,其它Region请按实际情况填写。
bucket = oss2.Bucket(auth, 'http://oss-cn-hangzhou.aliyuncs.com', '')

exist = bucket.object_exists('')
# 返回值为true表示文件存在,false表示文件不存在。
if exist:
	print('object exist')
else:
	print('object not eixst')

那么其实可以反过来想,直接拉文件目录落下来进行比较,列举文件的代码如下:

# -*- coding: utf-8 -*-

# 阿里云主账号AccessKey拥有所有API的访问权限,风险很高。强烈建议您创建并使用RAM账号进行API访问或日常运维,请登录 https://ram.console.aliyun.com 创建RAM账号。
auth = oss2.Auth('api-key', 'api-secret')
# Endpoint以杭州为例,其它Region请按实际情况填写。
bucket = oss2.Bucket(auth, 'https://oss-cn-beijing.aliyuncs.com', 'bucket-name')

file_arrary = []
# 设置Delimiter参数为正斜线(/)。
for obj in oss2.ObjectIterator(bucket, delimiter='/'):
    # 通过is_prefix方法判断obj是否为文件夹。s
    if obj.is_prefix():  # 文件夹
        #print('directory: ' + obj.key)
        for obj2 in oss2.ObjectIterator(bucket, prefix='%s' % obj.key):
            #print('file: ' + obj2.key)
            file_arrary.append(obj2.key)
    else:  # 文件
        file_arrary.append(obj.key)

如果要判断文件是否存在,只需要在数组中进行比较就可以了

file_arr = []
for file in file_arr:
    if file in file_arrary :
           print('esixts')
    else:
           print('not exists')